
I’ve been working on installing a washdown pump for about a month now. I’ve been thinking about it for a couple of years. I tried using a DC pump that I just lowered over the side, and it was sort of okay but not really convenient, as it took a long run of wires to power it.
After online research on message boards and equipment, and getting advice from Kurt, I finally ordered the materials (pump and hose) I’d need to install a washdown pump, using the intake line to my boat toilet (aka, head) for the water intake. I’d seen this as a viable option on boat message boards, as it meant you didn’t have to put a new hole in your boat for a through-hull fitting.
The first thing I did was get Dorothy to help me. I needed a skinny body to drop down into my engine room and feed the 1/2-inch hose from the rear of the boat through the engine room and up to the bathroom, where the 3/4-inch line leading to the head was available for splicing into. We completed this task and some other little things in an hour, and that got her lunch at McDonald’s and twenty bucks from Uncle Mark.
The 3/4-inch line coming up from the through-hull fitting ran under the bathroom sink counter, and that’s where I figured I could splice into it with a 3/4-inch to 1/2-inch tee to divert water to the pump via a 1/2-inch line. Under the counter was also a convenient, accessible, and out-of-the-way location to mount the pump. On my hands and knees, I could look through the cabinet doors under the sink and see the intake line about 3 feet away under the sink counter along the starboard hull. I could also see the line from above when I took out the counter drawer, which was right over it. But I had my doubts about actually getting to the hose in the narrow area under the sink counter or the narrow drawer opening. How would I get enough leverage to cut the hose and then install the tee hose barbs in such a tight space? I could barely squeeze my shoulders in there to reach it from the side and could only reach one arm through the drawer opening to reach it from above. I even asked Bob about neatly cutting an access panel through the top of the bathroom cabinet that I could reinstall without it looking butchered.
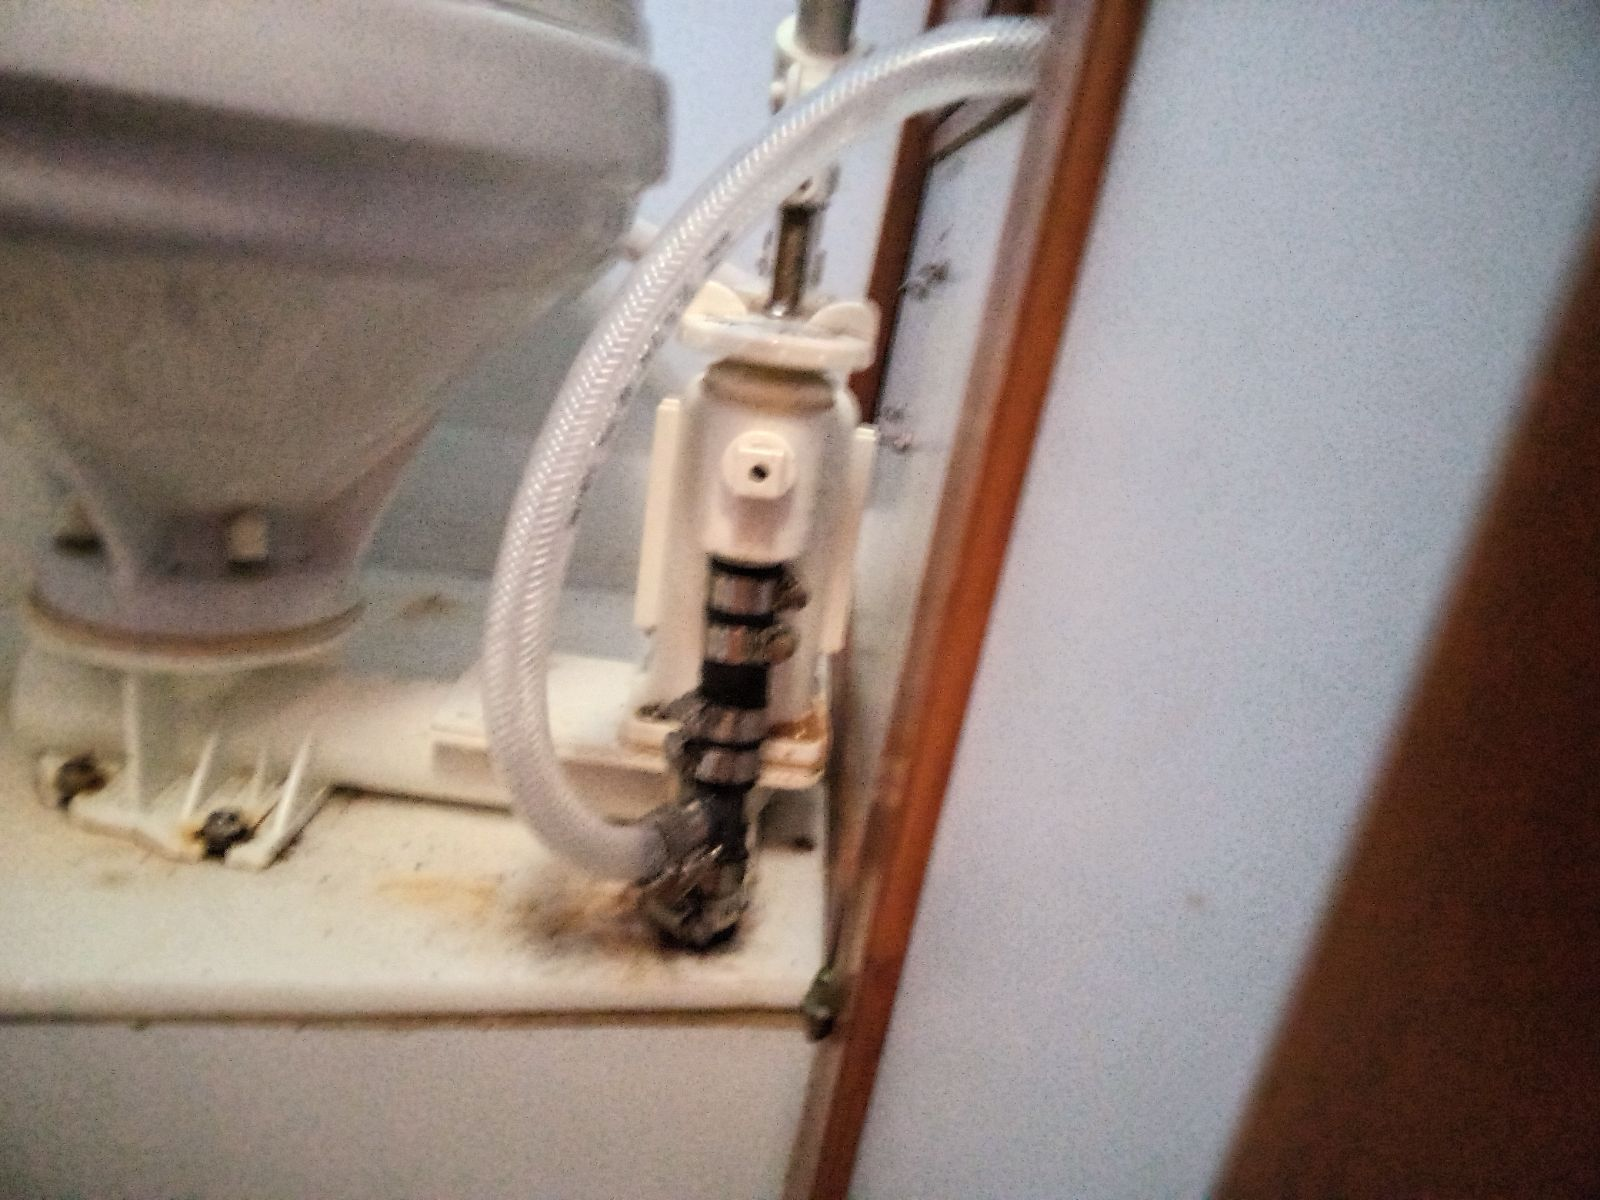
As I sat there wondering just how I was going to do all this, I saw it: the hose line coming up to the manual head pump was right there in front of me in plain sight! All I had to do was loosen the hose clamp and hope it would pull down from the pump intake nipple, which it did surprisingly easily! From there, I just pushed the hose down a bit and put the tee in the end! I walked up to Harri’s for a little piece of 3/4” hose to connect from the other side of the tee back to the intake nipple. I was in business.
I drilled a hole through the cabinet. Then I fed a piece of the 1/2-inch hose from the tee through the cabinet wall and clamped it to the fitting on the intake side of the pump. Then, I clamped the hose coming in from the engine room to the outflow side of the pump. Finally, I bolted the pump in place to the inside of the cabinet wall. That part was done.
Now for the other end of the hose on the back deck. There are two teak steps attached to the back wall that are for climbing up onto the roof of the salon area. Under one of the steps, I had installed the outlet for the freezer on the back deck last year. I decided to install the spigot under the other step. First, I had to run the hose through the salon cabinetry, then under the bench seating around the salon table, which didn’t require any drilling as there was ample space in holes where other lines were already installed. I drilled a hole under the step from the outside wall, then fed the hose from the salon out the hole and clamped it to a fitting that would connect it to the hose bib I mounted under the step. I used a continuous piece of hose from the outlet of the pump all the way to the outside of the back wall, so the only place the system could leak inside the boat was at the fittings on the pump under the bathroom sink—short of the hose line itself springing a leak, which is unlikely. After I hooked up the hose to the spigot, I went back inside and neatly secured the hose with hanger straps down the inside wall of the salon and under the benches so it was out of the way.
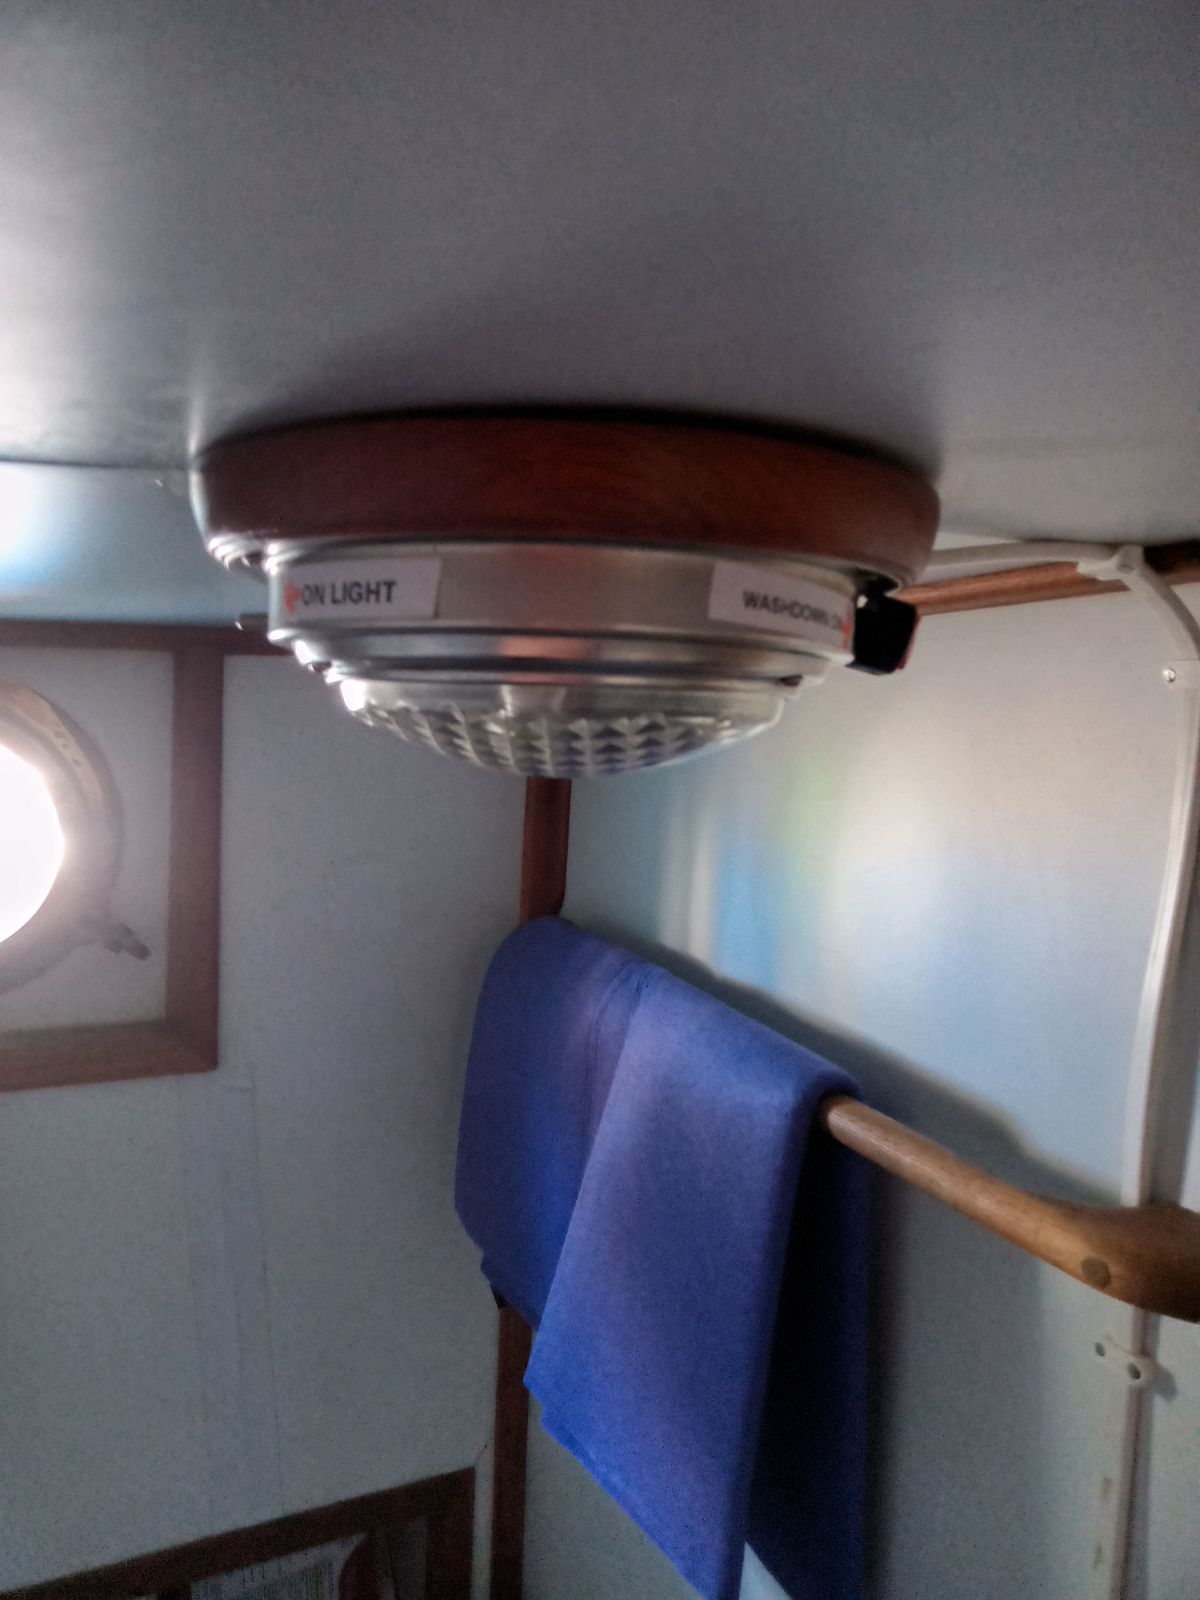
Lastly came the wiring of the pump. I considered several different circuits on the boat to run the pump through, as I didn’t want a direct connection to the battery but rather wanted it to run through the fuse panel. Then, again, I saw it—there’s a light on the ceiling of the bathroom! I’d never noticed it before. I threw the switch on for the lights in the forward berths, and flicked the switch on and off on the bathroom light. Nothing happened. I then removed the light’s globe glass and dropped the fixture down. I tested the wires with the battery meter. Bingo. 12.3 volts. When I removed the bulb, I could see it was cloudy and likely no good.
My final problem was where to put in a switch for the pump. Most DC switches nowadays are made for the very thin walls of aluminum or console board, not for thicker cabinet walls. I had no switches with long enough necks to go through the wall, and in fact had had this same issue when I installed a wiper switch. I knew these long neck switches were not available in town. I had an appointment approaching in mid-afternoon, so I quit for the day about halfway through the wiring.
On the way home, I had my final epiphany: just install another switch on the housing for the light! The light housing is a thin piece of metal, and this made things very simple. I put in the extra switch, then put in a new bulb and got the light working. After I installed the second switch, I tested it with the voltmeter until I had the wiring to the right leads on the switch, then remounted the light fixture back in place. I’d drilled a hole in the side of the light fixture mount to feed in the sheathed wiring. The wiring sheath is white and matched the white color of the bathroom walls nicely. I used white plastic wiring staples to neatly secure the wire from the light fixture along the ceiling, then down the wall through another hole drilled through the counter and down to the pump.
I connected the wiring to the pump, walked outside to open the spigot valve, and threw the switch at the light fixture. I could hear the pump working and thought I heard something outside, but I could not see any water coming up the clear hose from the tee to the pump in front of me. I thought the outside noise was just air moving through the system. I tried jiggling the toilet valve to be sure it was closed and that I wasn’t sucking air, and felt around the pump fittings, but could not feel any air or water leaks. Finally, I went out to the spigot, and it was gushing water. I couldn’t see the water moving through the hose, but it was moving alright! I finished my last task of the project by securing the wiring under the counter so it would be out of the way, and that was it! Now for cleanup and putting things away, which I’ll spread out over today and tomorrow.
A satisfying last major project I wanted done on the boat for now to make it how I want it. The washdown pump will replace the back-breaking chore of throwing over a 6-gallon bucket over the side to get water to clean fish or clean the deck, and make cleaning fish a lot easier and thorough.